Update: Classes no longer require sign-in.

Website DIY #6: Social Media
Scheduling and autoposting to social media; automating share images.
Like newsletters, we hate and are bad at social media. But unlike that, we’ve found some tricks to automate parts of it to save time.
Channels
First, where are we at on social media?
As much as we hate being party to these evil dogshit sites, and as much as we’d love an open-source or public utility-like platform to vanquish Mark Zuckmeoff once and for all, we want to reach people and let our writers promote our work. So, we could post to our audience of 0 on Mastodon or post to people where they are, unfortunately, at. So, that’s what we do. We actively use:
Scheduler
Buffer
We use social media scheduling app Buffer to schedule all our posts. We’re paying for a Pro plan ($144.00/yr.), because we thought we’d use more channels and schedule more posts at a time, but seeing as we are really only supporting those 3 right now and not doing bulk (manual) scheduling (more on that in a sec), we can probably easily downgrade to the free one next cycle.
Auto-reposting
We use a paid WordPress plugin, WordPress to Buffer Pro by WP Zinc ($199/lifetime), to auto-post from the site to Buffer. It’s configurable in lots of useful ways – you can customize how it handles new posts, updated posts, or (automatic) reposting. Maybe some other things too? But we use it for new posts and reposting.
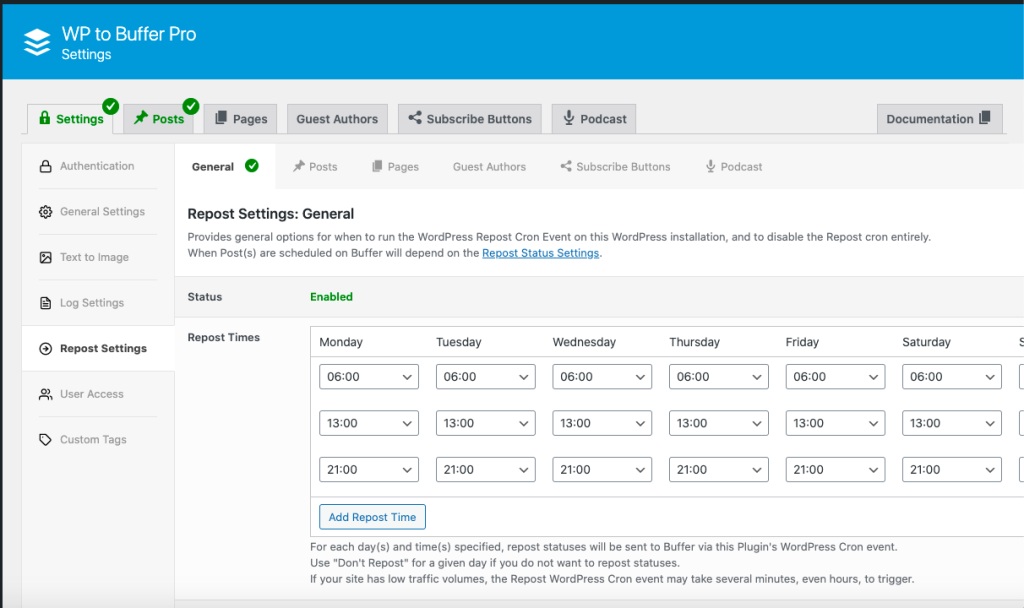
Here’s a screenshot to give you an idea of how it works:
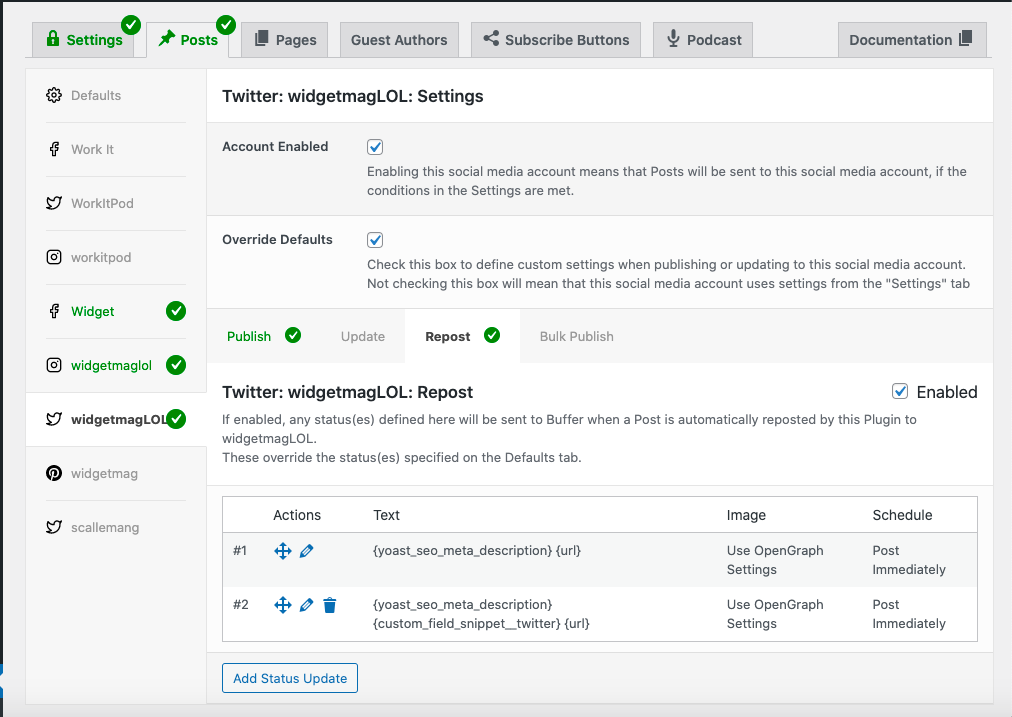
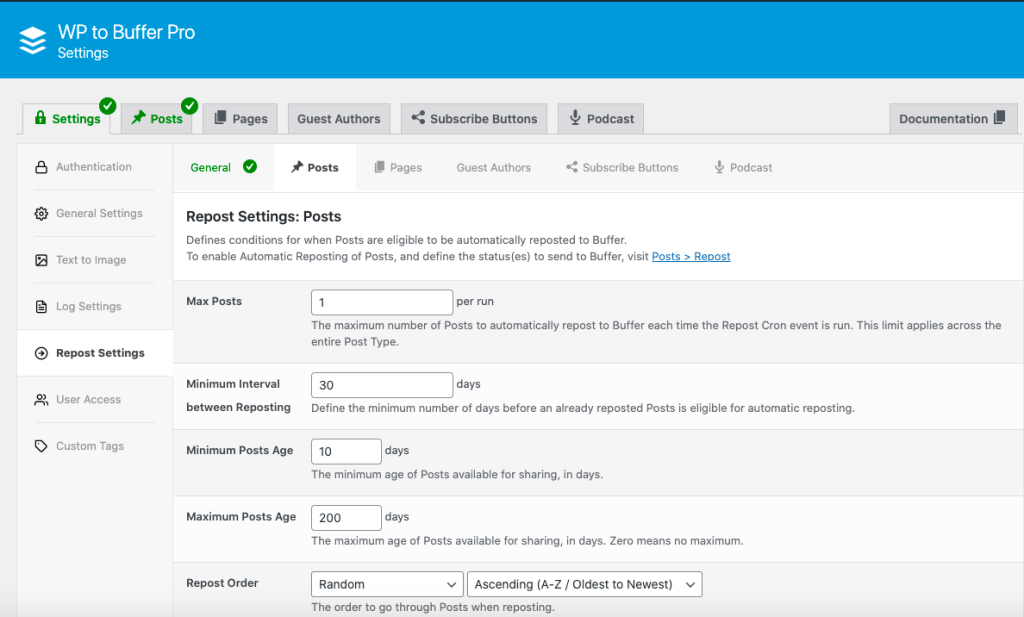
You can see the three channels we have active on the left. On the right, just by way of an example, you can see how our posts are re-posted to twitter. It probably looks like gibberish, and will continue to do so w/o digging into the code a bit, but we’ll at least show the inputs and outputs. (General scheduling/configuration happens in a couple other screens, which we’ll show now:)
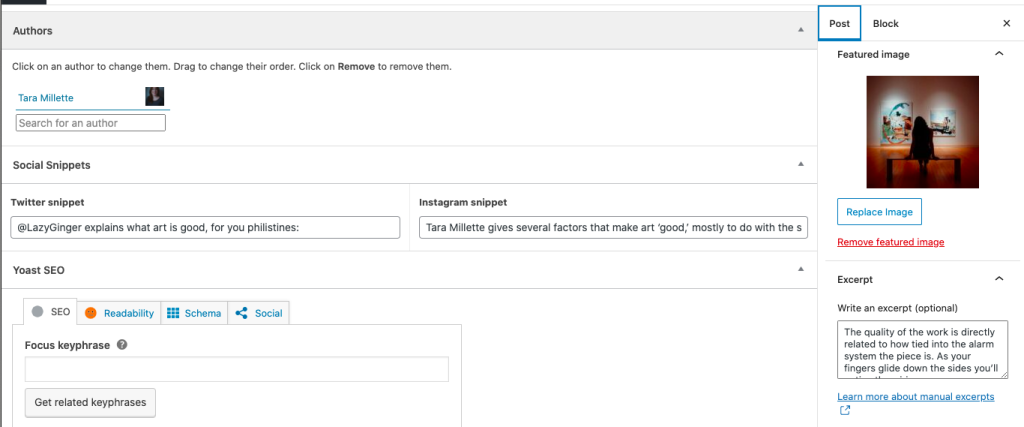
So, in practice it grabs the post description, a custom field I added for its snippet (this is where we reference the person’s @-handle if applicable), and the post link, and sends that to twitter according to the options set in my general settings.
One example and we’ll move on. Here’s the custom fields, featured image and post excerpt from Tara Millette’s post:
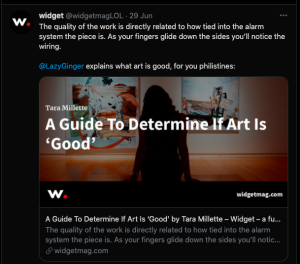
And here’s what it looks like when it gets (automatically) sent to social media:
Not bad! Looks pretty nice and saves a fuck-ton of time. The one other piece here is this:
Social Sharing Images
A discussion on Shop Talk Show tech podcast on automatically generated social media images set me a-googling. (Related blog post where they give an additional recommendation for WP.)
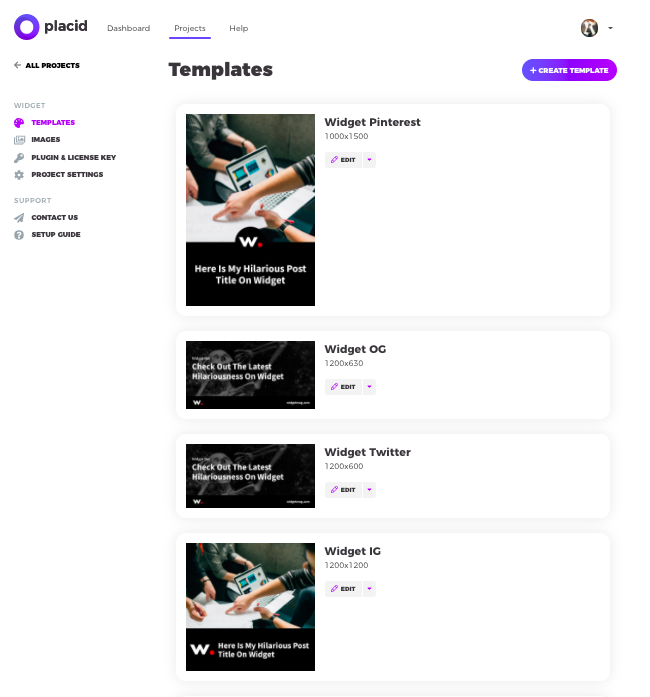
We ended up trying a (paid) app called Placid and we love it, and their support was really great when we had questions. How it works is, you pick or design a template, set what ‘ingredients’ from your post to use where (e.g. author name, post title…), and it automatically creates the images and attaches them to your post. Holy shit!
So, here for example, are most of our post templates, and you can see above how it has taken info from Tara’s post and rendered very nice images for twitter and instagram. Wa-wa-wee-wah.
More in the series
- Website DIY #1: Intro & Domain
- Website DIY #2: On Starting A ‘Magazine’
- Website DIY #3: Site Setup
- Website DIY #4: Monetization (Quick Overview)
- Website DIY #5: Newsletters
- Website DIY #6: Social Media
- Website DIY #7: Pitches/Submissions
- Website DIY #8: Analytics/Traffic
- Website DIY #9: Accessibility
- Website DIY #10: Podcasting
- Website DIY #11: Equity
- Website DIY #12: Email & Responding To Pitches
- Website DIY #13: Payments
- Website DIY #14: Admin Tools/Apps
- Website DIY #15: Networking
- Website DIY #16: Audience
- Website DIY #17: Stock Assets (Photos/Illustrations)
- Website DIY #18: Finances (How To Lose Money!)
- Website DIY #19: Wrap Up: Wins & Losses
